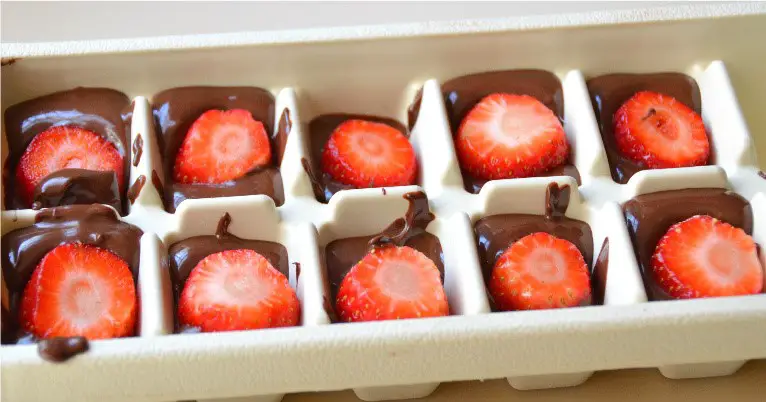
You are probably wondering what ice cube chocolate strawberries are. Well, look or wonder no further, I will walk you through the steps of what this amazingness is. Anne took her ice maker and filled them up with little-chopped strawberries and then added melted chocolate over the top. Then she chilled them and let them settle until they were solid. She gave them to her kids and when they bit into it, they stayed in one piece. I would say that is a wonderful invention!
Check out what our friends over at Tip Hero had to say about this:
“No more spending $2 each for a filled chocolate at those expensive chocolate stores. You can make delicious filled chocolates at home, customize them with your favorite fillings and have some fun while doing it.”
My husband was elated about making these at home instead of going out to buy them!
Ingredients
2 1/2 cups Ghirardelli milk, or dark chocolate, chips
2 1/2 tbsp coconut oil
2 tbsp chunky Jiffy peanut butter
6 soft caramel chews
2 tbsp chopped, salted, roasted peanuts
2 large Jet Puffed marshmallows, cut in half and sides trimmed
Cooking spray
Pastry brush
Ice cube tray
Instructions
Place the chocolate chips and coconut oil in a microwave safe measuring cup or bowl.
Microwave the chocolate in 30 second intervals until melted (stir between each interval) should take about 90 seconds depending on your microwave.
Spray the ice cube tray lightly with cooking spray, and use the pastry brush to coat all sides up to the top of the tray. Also, use the brush to remove any excess cooking spray so there is not a pool in the bottom of the trays.
Fill the ice cube tray about ⅓ full with your choice of chocolate.
Allow the chocolate to sit in the ice cube tray for 2-3 minutes.
Tilt the trays and rotate to make sure that the melted chocolate coats all of the sides of the tray.
Put your chocolate shells in the freezer for 1-2 minutes until the chocolate has slightly thickened, but is still liquid.
Tilt the trays and rotate again to make sure that the melted chocolate coats all of the sides of the tray with a thicker coat of chocolate this time.
Allow the chocolate to sit in the ice cube tray for 2-3 minutes until it is mostly set.
While the chocolate is setting prepare the fillings. Take each caramel and mash in 1 tsp of peanuts so that it is well combined. Cut the marshmallows in half lengthwise and trim the sides to fit in the ice cube tray.
Fill the chocolates with soft caramel chews and chopped peanuts, peanut butter, or marshmallows. Try to make sure that the filling stays in the center and does not touch the sides of the tray too much or the chocolates may stick in those spots when they are unmolded.
If needed, refresh the melted chocolate by heating in the microwave for 20 second intervals, stirring between each, until the chocolate is melted again.
Pour the melted chocolate over the filling until it is covered by a layer of chocolate.
Tap the ice cube tray on the table to allow the air bubbles to escape and the chocolate to settle. Push down the marshmallows if they start to float to the top of the tray and show through the chocolate.
Pour more melted chocolate over the filling if needed until it is covered by a layer of chocolate again.
Clean the top of the ice cube tray so that you can see the partitions that separate the “cubes”. This will help prevent your chocolates from sticking together and help them to release from the tray when it is time to unmold them.
Place the trays on a flat surface in the freezer for about an hour until the chocolate has hardened.
Remove the trays from the freezer and allow to temper for about 5-10 minutes.
Unmold the chocolates by lightly twisting the ice cube tray as if you were trying to release ice. Turn the tray upside down over a sheet tray lined with wax paper or parchment paper to catch the chocolates. You may need to lightly tap the bottom of the tray to coax the chocolates to release or you may need to twist the ice cube tray a few more times.
USE RED NEXT PAGE LINK BELOW.
Quick Tip: Be sure to keep these chilled in the fridge
Thanks again to Tip Hero for this amazing recipe.

