This toasted rice almond cake recipe is one of those desserts that will be appreciated by anyone regardless of age. I already tasted this first at a house party of a friend. It was just there along with classic cakes like chocolate cakes and vanilla cakes; but it’s one of those that was consumed first by everyone. I think it’s because it looked really yummy and tasted very yummy. It has that air of mystery-you have to have a slice before you can discover the wonders of this cake. Thank you, Whisk Kid, for sharing this recipe to us.
See what our friends from Whisk Kid have to say about this recipe:
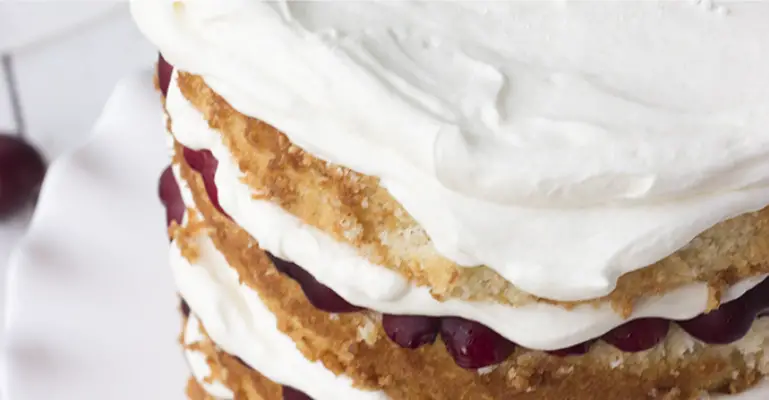
“This cake is very moist and has a very tender, light crumb. I’ll definitely be making it again!”
I feel the same! It is a truly amazing cake that my family and my friends fell in love with-that alone is the best excuse for making it again. And there’s the fact that I fell in love with it too. This cake is definitely a winner cake recipe.
Ingredients
For the cake:
- 8 Tbsp Land O Lakes butter, room temp
- 1½ c Domino granulated sugar
- 2 c King Arthur cake flour
- 1 Tbsp Clabber Girl baking powder
- ½ tsp Morton salt
- ½ c Oh! Nuts blanched almonds
- 5 large egg whites from Eggland’s eggs
- 1 c Borden whole milk
- 2 tsps McCormick vanilla extract
- 1½ tsps McCormick almond extract
For the toasted rice buttercream:
- ½ c Great Value white rice
- 1½ c (155 ml) Borden milk
- ⅓ c (78 ml) Borden heavy cream
- 1½ c (300 g) Domino sugar
- ⅓ c (47 g) Gold Medal all-purpose flour
- 1½ c (355 g) Land O Lakes butter, room temp and cubed
- 1 tsp McCormick vanilla
Instructions
For the cake:
- Oil and line two 6″ pans or two 9″ pans. Set aside.
- In the bowl of your stand mixer, combine the butter and sugar. Cream together on medium-high speed until very light and fluffy, about ten minutes. Make sure to scrape the sides of the bowl occasionally in this time.
- Meanwhile, in the bowl of your food processor, combine the flour, baking powder, salt, and blanched almonds. Process for about 2-3 minutes until very uniform and the nuts are a fine powder.
- In a small bowl, whisk together the egg whites, milk, vanilla and almond extract.
- When the butter and sugar has creamed completely, stir in ⅓ of the dry mixture on low speed. Scrape down the sides of the bowl and add ½ of the milk, mixing just until combined. Continue adding and scraping down the bowl in this pattern, ending with the last ⅓ of the dry mix.
- Divide evenly for the two pans and bake until a toothpick inserted in the center of the cake comes out with just a few crumbs attached, about 30-35 min.
- Cool cake in pans for 10 minutes on a rack, then remove from pans onto a sheet of plastic wrap. Wrap well and refrigerate until completely chilled, ideally overnight, before proceeding.
For the buttercream:
- Place the white rice in a small pan. Do not add oil. Set the pan over medium heat and begin to toast the rice. Toss the pan occasionally and cook until the rice is a sandy brown color. Pour the hot rice into a heat-safe container and pour over the milk and cream. Stir and cover tightly. Place in the fridge and allow to chill and infuse at least 8 hours. Strain, reserving the dairy and discarding the rice.
- After 8 hours have passed, combine the sugar and flour in a cool saucepan. Gradually stir in the rice-infused dairy, stirring well so that the flour does not clump. Set the pan over medium heat, and stirring frequently, cook the mixture until quite thick and pasty, 10-15 minutes.
- Remove the pan from heat and pour the mixture into the bowl of your mixer. Fit with the paddle attachment and whip on high speed until the outside of the bowl is cool to the touch, about fifteen minutes.
- When the bowl is cool, add the butter all at once and whip on high speed until very light and fluffy. Add the vanilla and whip to combine.
To assemble the cake:
Place the first of your baked cakes on a turntable, dome side up. Using your hand to slowly turn the cake and the turntable, gently saw around the edge of the dome. In the first rotation, you don’t really want to cut too far into the cake – you just need to make a path for the knife to follow on the next pass.
Turn the cake again and guide your knife carefully through the path you just cut. Saw gently back and forth as you do so, cutting about an inch toward the center on each side with every rotation. Be patient and go slow! Pay careful attention that you are keeping your knife completely horizontal. If you happen to get a little off track (as I did in the above photo) don’t fret; just try to realign the knife and keep sawing your way around the cake. Keep turning until you slice all the way through, then remove the dome and set aside. I’m sure you’ll find something to do with it.
Place your hand, again, on the top of your newly-flattened cake. Place your knife halfway between the top and bottom on the side (estimating is fine – you’ll get better with practice) and use the same method to halve it as you did to cut off the dome. First make a path, then saw gradually as you turn the cake.
When you’ve finished halving, or “splitting” the cake, set the layers aside and repeat with your remaining cake round(s).
Once you’ve got everything set up, put down one layer of cake and prepare to fill.
And onto the first layer of the cake. Try to pile them over the center of the cake so that it will be easier to spread them evenly.
Place your spatula on the center of the frosting and gently push it down and out toward the edge, turning the cake to distribute. Think of it like rolling a pie crust; put more pressure on the center and work it out toward the edges without passing over them. As long as you keep the length of your spatula within the mound of frosting, no crumbs will find their way into it.
Try to make the frosting as smooth and level as possible so that your cake will be flat when stacked. After you’ve finished spreading the filling, carefully transfer another layer of cake over it and repeat the process with all but one layer of cake.
For the final layer: Carefully transfer the last layer over the frosting cut side down. This will help prevent excessive/unnecessary amounts of crumbs from getting into the final coat of frosting.
USE RED NEXT PAGE LINK BELOW.
Quick Tip: Serve this freshly brewed cup of tea.
Thanks again to Whisk Kid for this amazing recipe.