These do take a little bit of work, but they are so worth the effort in the end. I had several requests for the recipe at the end of the shower, and I didn’t have any problem sharing. I am sure they will be used for all kinds of events. I know that my sister has used them as snacks at her school where she works as a school teacher, and the kids just love them. There are so many different things you can do with them, you can be sure that everyone gets a flavor that they like by personalizing each one!
Check out what they are saying about this recipe over at The Recipe Rebel:
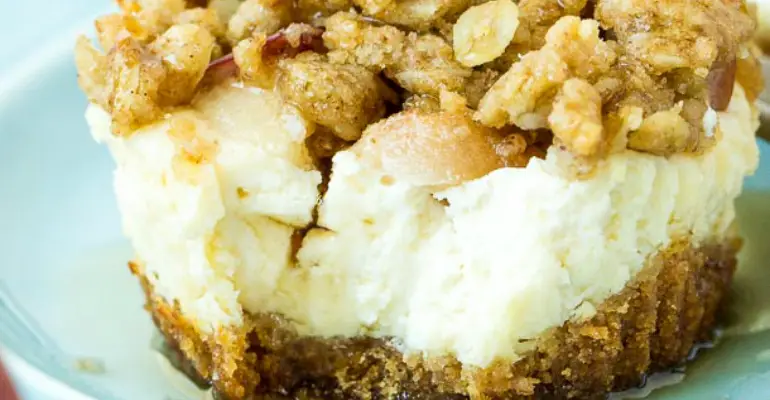
“Mini cheesecakes topped with fruit and streusel — so easy to customize to your tastes or to make a variety of flavors for guests!”
It’s fun to make these in all different flavors for social events and potlucks… people love them!
Ingredients
For the crust:
¼ cup Land O’ Lakes butter, melted
2 cups graham crumbs
For the cheesecakes:
3 8oz packages Philadelphia cream cheese
3 eggs
1 tsp vanilla
¾ cup sugar
Finely chopped apples, peaches, pears, other fruit
For the crisp
¼ cup butter, quite soft
¾ cup Gold Medal flour (I use whole wheat)
1 cup oats
½ tsp cinnamon
⅔ cup brown sugar
Instructions
Preheat oven to 350 degrees F.
Line 24 muffin tins with paper liners.
Combine butter and graham crumbs. Spoon 1 tbsp crumbs into each liner and press down with your thumb.
With a stand mixer or handheld mixer, beat cream cheese until smooth. Add eggs, vanilla and sugar and beat again until smooth.
Ladle batter into liners, leaving room at the top for fruit and streusel.
Top with finely chopped fruit of choice.
Combine all ingredients and mix together until crumbly. Sprinkle on top of fruit on the cheesecakes.
Bake for 18-20 minutes until centers are just set.
Bring to room temperature and refrigerate for at least 2 hours before serving.
USE RED NEXT PAGE LINK BELOW
NEXT PAGE >>
Quick Tip: Make ahead of time and freeze until you’re ready to eat!
Thanks again to The Recipe Rebel for this scrumptious recipe.