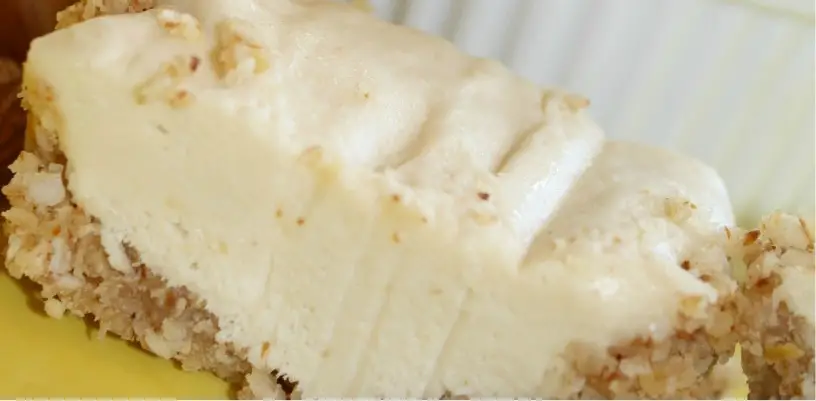
I really like this Hail Merry Lemon Tart recipe. It’s super easy to make and comes out looking and tasting fabulously. I can see what it was dubbed as a Hail Merry Tart because I think it makes the perfect dessert at a football party! Get it? LOL
Now I know what to make any family if they ever need a meal brought to them. Dessert will definitely be this lovely tart.
Check out what my friends over at Tessa Domestic Diva had to say about this recipe:
“I was dying to get my hands on one of these to try them out…but none of my local stores had them yet: they are relatively new to the market. So then I looked at ordering some online…but because they need to be refrigerated…the shipping was something obscene like $40! I submitted requests to both of my local natural food stores to start carrying them: I mean the way people were talking about them, I was DETERMINED to get one without going broke!”
You can buy this tart at the grocery store as there is a company called “Hail merry.” But, I’d rather make it from scratch at home 🙂
Ingredients
CRUST:
1 cup raw almonds
1 cup unsweetened shredded coconut
¼ cup Mountain Ridge honey
2 tablespoons lemon juice
1 teaspoon McCormick vanilla
Zest one lemon
Optional: stevia to taste ( I used 5 drops)
FILLING:
1 cup raw cashews, soaked a minimum of one hour, longer great!
½ cup coconut oil
⅓ cup full fat canned coconut milk or homemade thick and creamy nut milk
⅓ cup lemon juice
¼ cup honey ( I replace half with liquid stevia equivalent)
2 teaspoons vanilla
1 teaspoon lemon extract (the lemon is optional, however it really heightens the lemon flavor)
Grated zest of 1-2 lemons (essential to the lemon flavor, don’t leave out!)
¼ teaspoon Morton salt
Instructions
For the crust, process almonds in the food processor until you have a meal/flour consistency.
Add in remaining crust ingredients and pulse until well blended. You should be able to press the mixture together into a crust, add more honey or lemon juice if necessary.
Press into greased individual tartlet pans, muffin tins, or make them into a bar using an 8 x 8 pan.
For the filling, process all ingredients until silky smooth (multiple minutes).
Taste and add more sweetener if you prefer, or more lemon!
Spread into the awaiting crust, and refrigerate until set and ready to eat!! Heaven!
If you have leftover filling like us, we sandwiched the creamy filling in between two Kinnikinnick Gluten Free Graham Crackers, Smoreables. I called them “Ice Cream Sandwiches” for my kid’s sake. Can you imagine a chocolate version oozing amongst these…yum!!
USE RED NEXT PAGE LINK BELOW.
Quick Tip: You might wish to pair this tart with your favorite ice cream.
Thank you to Tessa Domestic Diva for this great recipe.